Converting a bathtub to a shower is far more than swapping fixtures. It is a strategic upgrade that can improve safety, reduce maintenance, and modernize an entire home. Yet the project succeeds best when guided by professional insight. This checklist explains what homeowners should discuss with a qualified remodeler such as Statewide Remodeling before any demolition begins.
1. Clarify Your Primary Goal
Most bath‑to‑shower projects begin with one of three motivations:
-
Safer access —eliminating high tub walls and adding slip‑resistant features for aging family members or guests with mobility challenges.
-
Daily convenience —speeding up busy routines and removing a hard‑to‑clean tub that no one uses.
-
Style and resale —refreshing dated tiles and improving market appeal for an upcoming sale.
Share your top priority with the design consultant at the first meeting. It guides every later choice—base height, enclosure type, storage features, and even fixture finishes.
2. Invite a Professional Site Assessment
Instead of pulling out a tape measure yourself, let the remodeling team perform a detailed survey. During an on‑site visit, a trained specialist will:
-
Digitally measure the alcove to the eighth of an inch, noting any out‑of‑square walls or uneven subfloors.
-
Inspect plumbing to confirm drain size, venting, and valve placement meet current code.
-
Check structural framing under the tub for signs of moisture or joist sag that could affect a low‑profile shower pan.
-
Evaluate ventilation to protect new finishes from mold and mildew.
That information becomes a baseline for design recommendations and a firm quote, sparing you the risk of costly change orders later.
3. Understand the Plumbing Essentials
A professional remodeler handles permits and ensures every hidden component meets local regulations. Key behind‑the‑wall topics that come up in most consultations include:
-
Drain upgrade—many jurisdictions now require a 2‑inch line for showers.
-
Trap alignment—the new pan’s outlet must sit exactly above the P‑trap to avoid standing water or odors.
-
Valve height—controls should be comfortable for standing users (and an optional secondary control for a seated bather or future bench).
-
Subfloor recess—needed for true curbless entries; your consultant can confirm if joists allow it or suggest a slim ramped pan.
Because licensed plumbers handle these tasks, homeowners gain the benefit of code compliance and manufacturer warranty protection.
4. Select the Right Shower System
Professional remodelers typically offer three broad categories, each suited to different budgets and timelines:
When selecting the right shower system, professional remodelers typically offer three main options to suit various budgets and timelines.
Acrylic or composite kits are ideal for clients who need a quick turnaround and predictable pricing. These systems feature one-piece pans with low thresholds and factory-finished wall panels, allowing installation to be completed in just a few days.
For homeowners who want the upscale look of stone without the hassle of grout maintenance, Kohler LuxStone is a popular choice. This option includes crushed-stone composite walls, slip-resistant pans, repositionable magnetic shelves, and a robust warranty.
Lastly, custom tile and mortar pan systems are best suited for design-centric projects that allow for a more flexible schedule. These offer unlimited shapes and patterns but require the highest level of labor investment.
Statewide Remodeling is a certified Kohler LuxStone dealer, giving clients an option that blends boutique style with time‑tested engineering.
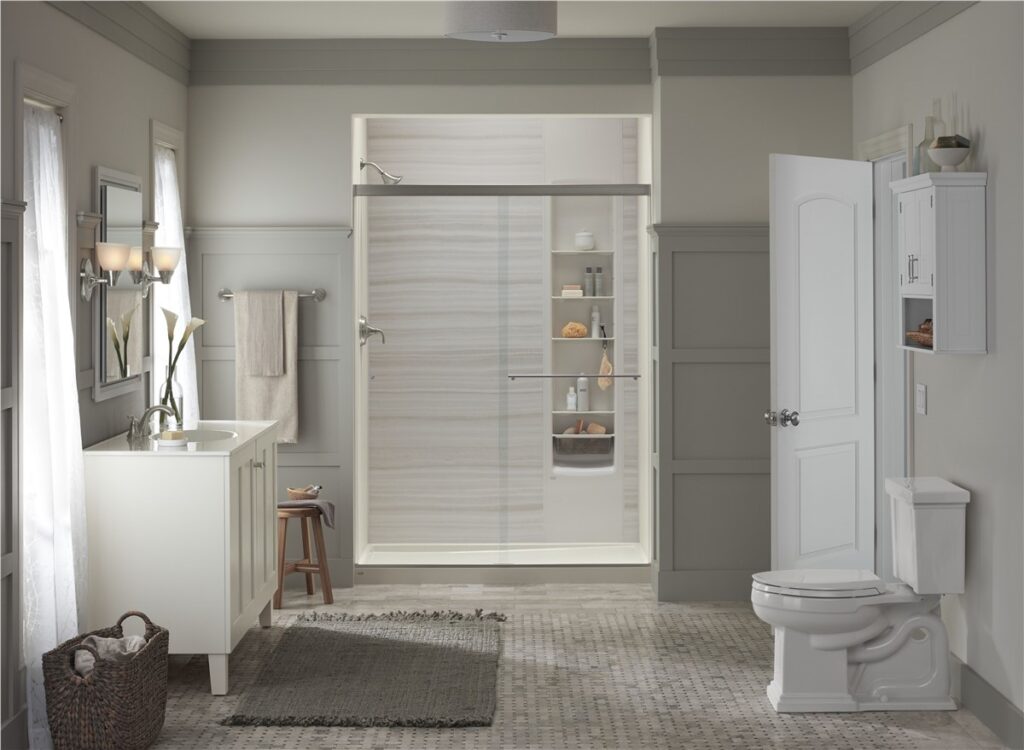
5. Plan Storage, Seating, and Safety Features
A professional designer will recommend interior accessories that match your daily routine:
-
Recessed niches sized for taller shampoo bottles.
-
Magnetic floating shelves (exclusive to LuxStone) that move as kids grow.
-
Fold‑down or corner seats for shaving or assisted bathing.
-
Grab‑bar blocking installed behind walls—even if you choose to add bars later.
These elements are easiest to integrate at the planning stage, not as after‑thoughts.
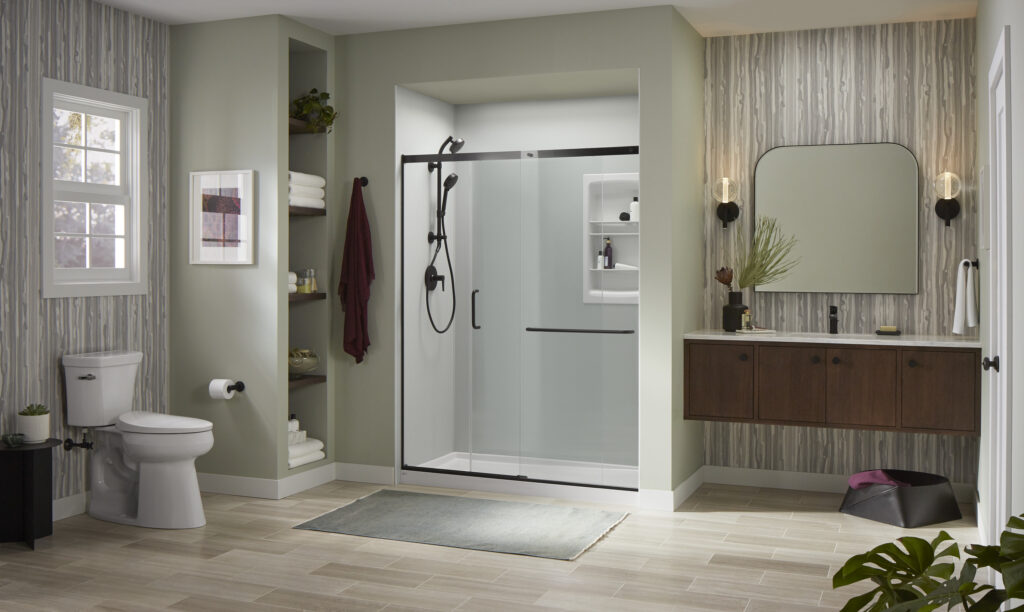
6. Discuss Glass and Enclosure Options
| Enclosure | When Professionals Recommend It | Key Benefit |
|---|---|---|
| Frameless swing door | Ample floor clearance; design statement | Crystal‑clear sight lines add visual space |
| Sliding bypass door | Tight baths with fixtures directly opposite | No door swing into traffic pathways |
| Fixed panel / screen | Minimalist aesthetic, ample shower depth | Fewer moving parts, easiest to clean |
Your designer can help you understand door swings and splash zones before committing in order to select the best option tailored to your space.
7. Consider Lighting and Ventilation Upgrades
Professionals often recommend:
-
A higher‑capacity exhaust fan with humidity sensor to protect walls and ceilings.
-
Recessed LEDs above the shower for shadow‑free illumination.
-
Lighted mirrors to balance the brighter shower zone and aid grooming.
These improvements are modest in cost compared to re‑tiling later if moisture damage occurs.

8. Budget Factors to Discuss
Budgeting a bath‑to‑shower conversion isn’t a one‑number exercise; it’s a conversation about the variables that drive cost up or down. Before requesting quotes, be prepared to talk through these core elements:
-
Plumbing scope. Moving a drain or upsizing piping costs more than re‑using existing lines.
-
Base and wall materials. Acrylic systems land at the lower end of the spectrum; stone composites like Kohler LuxStone or fully tiled surrounds may make for a higher investment for additional features and convenience.
-
Glass complexity. Sliding doors are typically more economical than custom frameless panels or floor‑to‑ceiling screens.
-
Custom touches. Built‑in benches, multiple niches, and designer fixtures add function, but also additional labor.
-
Permits and debris removal. Fees vary by municipality and distance to disposal sites.
-
Timeline pressures. Rush orders or phased work to keep a bathroom partly operational can influence labor charges.
Ask each remodeler to break down how these factors affect the total investment. That transparency lets you compare proposals apples‑to‑apples and decide where to splurge or save.
9. Frequently Asked Questions for Your Contractor
-
Can the new shower be curbless in my existing structure?
-
How long will water be shut off during installation?
-
What warranties cover the base, walls, glass, and labor?
-
Do you handle permits and debris disposal?
-
Are financing options available, and how soon could installation start?
Having answers in writing protects both homeowner and contractor—and keeps expectations clear.
10. Consultation Checklist
Bring these items to your first appointment:
-
Inspiration photos or links (favorite colors, fixture finishes).
-
A rough list of must‑have features—seat, grab bars, niche count.
-
Target completion window (holidays, visiting relatives).
-
Questions about permits, debris, warranty, and special offers.
This information helps the design team build a tailored proposal, not a one‑size‑fits‑all kit.
Partnering with a seasoned remodeling firm takes the uncertainty out of a bath‑to‑shower conversion. When you choose Statewide Remodeling, our designers translate your goals into a code‑compliant plan, product specialists match materials to your timeline and budget, and factory‑trained crews install every layer to manufacturer specifications. The result is a watertight, low‑maintenance shower that reflects your style today and adds real value tomorrow.
Ready to move forward? Schedule a no‑obligation consultation and experience how seamless a professionally managed conversion can be.


.png)
.png)